How do I start to build restaurant website
You have decided to take the next step in online marketing for your restaurant. Social media is cool and all, but you want more. You want to create a homebase online for your customers that you can tell your restaurant’s real story. Not just images on a social media feed, but your complete story, and deliver what you have to offer your way. This article will guide you on How to Build Restaurant Website can get up and running today for under $99. Are you ready?! Let’s Go!
I will not get into the reasons why your restaurant should have a website in this article. I covered this in a previous article you can find here:
7 Badass Benefits Of Website For Restaurants | 2021
This article will get down and dirty and get the ball rolling on building you a brand new and shiny professional website for your restaurant.
I’m sure that you are asking yourself:
How do I make a good restaurant website?
To make an excellent restaurant website, you need five main things:
- A consistent domain
- Hosting plan
- Website builder with a Nice theme
- Online ordering
- A newsletter
What is the best website builder for a restaurant?
There are many website builders that you can use to build your Website. I personally like to use WordPress to build a restaurant websites because of its flexibility and countless plugins. You can also use other website builders like Wix and Squarespace, but them limited on options. And they can get expensive if you want to keep adding features.
How much should a restaurant website cost?
This article will show you how to build and launch a website for under $99. This $99 includes your yearly domain and yearly hosting fee. Everything else that we add on top of that is free.
And yes, I said less than $99. This is the flat cost of building a website. When hiring a web designer, they will charge you no less than $500 for a fully functional website. So, by reading this article, you are gaining more than the excellent knowledge that I will give you, but a fat lump in your wallet.
So, what are we going to cover in this article?
Choosing your domain
Before we get started on how to choose a domain, I’m sure you are asking yourself:
What is a website domain for my restaurant?
A website domain is your dot.com. I highly suggest that your domain matches or comes as close as possible to your social media profile names. If you are a new restaurant and haven’t through your social media profile names yet, start with your dot.com, and then choose your social media names.
Creating consistency online is extremely important so that you can appear high in Google search results. And not only that but so that your customers can easily find you online.
It is much easier to create marketing and advertisement material like flyers or tickers, with your dot.com matching across your online profiles.
If you already have your social media profiles, try to match your dot.com as much as possible to your social media.
You can use the below tool to see if the dot.com that you want to use is available.
How much does a domain cost?
An available dot.com domain costs $12.99 with most domain sellers. I like to use Bluehost because they offer additional security on your domain for $11.88. When you purchase a domain, the information of the owner of that domain becomes public. By purchasing the additional privacy protection, Bluehost gives lookers generic information instead of your confidential information.
Let’s Recap: If you want to purchase the domain without the security feature, you pay $12.99. And If you want security, you pay $24.88 total for one year. Once you choose your domain, you need to pick a hosting plan.
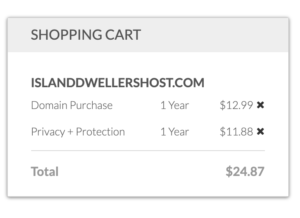
Let’s Recap:
If you want to purchase the domain without the security feature, you pay $12.99. And If you want security, you pay $24.88 total for one year. Once you choose your domain, you need to pick a hosting plan.
What is a hosting plan, and how do I know which one to choose?
First, we need to explain a little better what a website is. A website is a bunch of files, folders, and pictures that are online. So, imagine that your laptop is always connected to the internet and people can access it.
A hosting service is a vast and powerful computer that is extremely fast and can display your files (your resturant Website) online.
There are hundreds of hosting services, but my favorite is Bluehost. For a beginner, Bluehost is very user-friendly and easy to set up. And not only that, but they are one of the cheapest options.
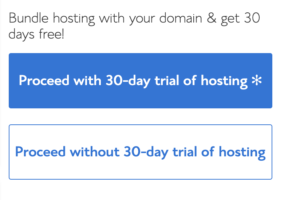
The remarkable thing is that if you purchase the domain in the previous step with Bluehost, they give you a free 30-day trial of their hosting plan.
So, remember when I said that you can get started today for less than $99—actually, it’s less than $30 today. But of course, you will want to choose the hosting plan within a month.
How much does a hosting plan cost for my restaurant?
Bluehost offers a variety of options. They are one of the best introductory-priced hosting plans in the market, starting at $3.95 a month if you choose the 36-month basic plan. This is the best value plan because it totals $142.20. That is $47.40 a year!
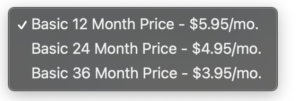
Since we will be building your restaurant’s Website with WordPress, make sure to choose the WordPress hosting option.
Bluehost also offers 12 and 24-month plans for a higher rate. I highly suggest that you choose the 36 months value because you will save half of what you will pay with the other plans. Also, note that the price will go to its regular rate when you are hosting pan renews.
Once you have chosen and purchased your hosting plan, it is time to set up your Website builder.
Website Builders: Wix, Squarespace, Weebly, or WordPress
There are a number of website builders on the market. Some of the most popular are the ones mentioned above. but if you chose the WordPress hosting plan, then we can continue with installing WordPress.
Oh, wait! I’m sure that you are asking:
What is WordPress?
WordPress is a website builder that helps you create your online web page. In the analogy that I used before, I said that the hosting plan has all your files on a server and displays them to the public. A website builder is also installed in that folder. It appealingly designs the files online so that they look like a webpage. Without a web builder, your files will look like regular text. A Web Builder takes all the complex Html coding and makes it easier for you to manipulate into a website.
This sounds confusing but trusts me. As soon as we have everything set up, it is a matter of uploading pictures and moving around blocks on a website.
Let's Start Installing WordPress.
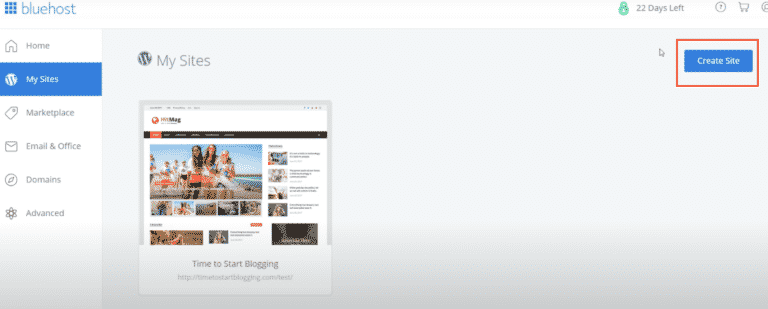
Once you have purchased your hosting plan and domain, please log in to your Bluehost Dashboard to get started.
- Click “My Sites”
- Choose “Create Site”
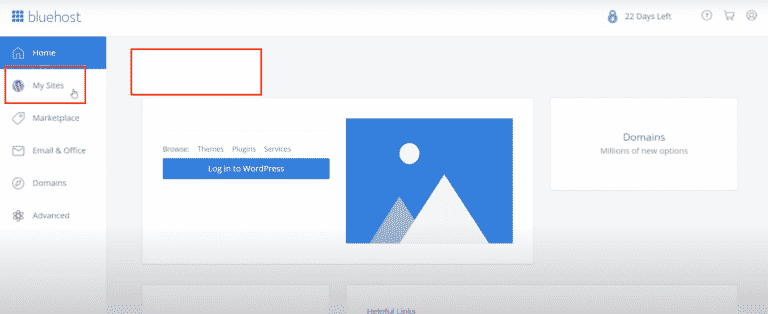
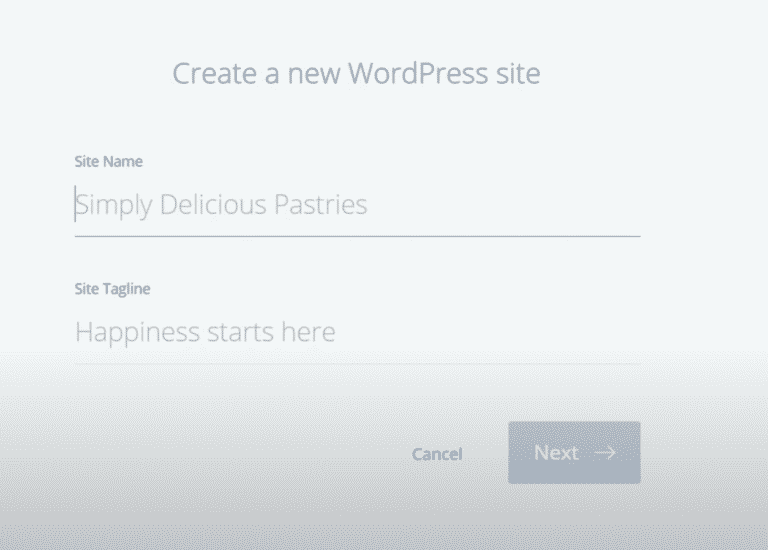
Choose and Type your restaurant Website name and Tagline and click on “Next.“
What is a website tagline?
A website tagline is a unique phrase that you can use to identify your site.
For Example:
- Website name: Kudough’s Donuts.”
- Tagline: “Best Donuts in Puerto Rico
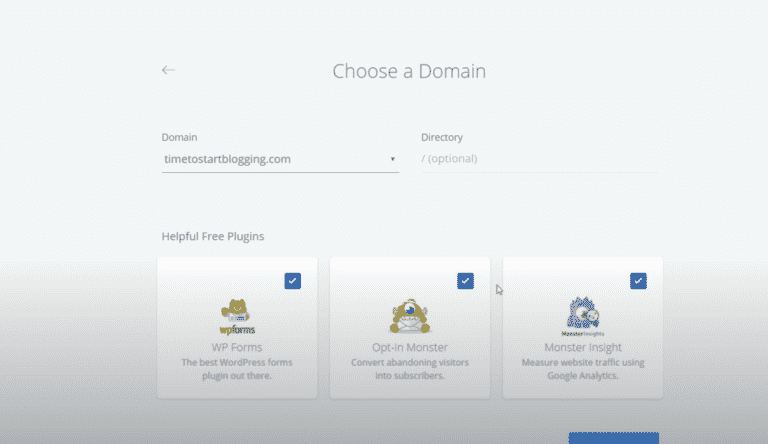
Now choose the domain you want to assign for this Website by clicking on the domain dropdown box.
Below the input boxes, you will see options to install plugins. You can click to uncheck these boxes. I usually leave the WP Forms plugin and uncheck the other two.
Your WordPress site will begin to install, and this should take a few seconds.
Once the install is complete, you can click on Log in to WordPress and access your site. You will also receive instructions via email with your login information.
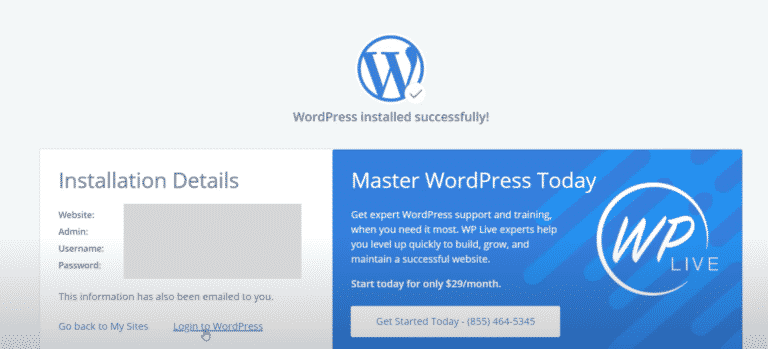
To log in to your Website’s admin panel, you just must use www.mywebsite.com/wp-admin to access the login page.
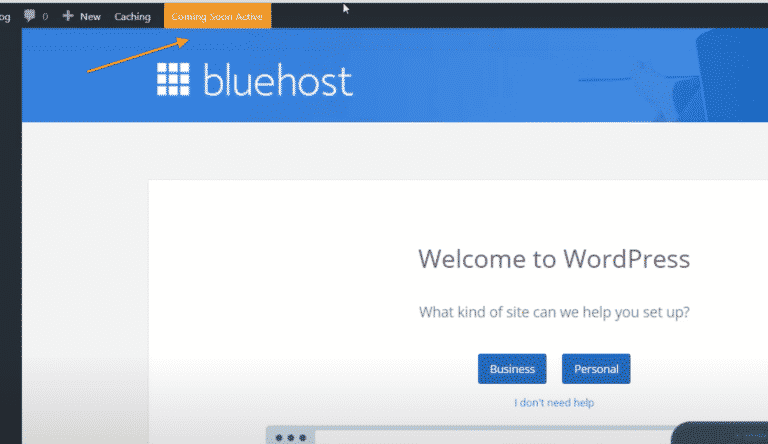
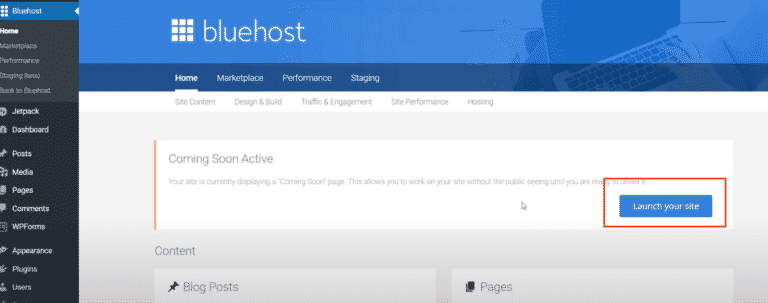
When you first log in to your restaurant Website with Bluehost, your Website will not be live yet. This is great because you can customize the site without it being visible. When you are ready to launch your area, all you need to do is click on the top bar’s link that says Coming Soon Active. And on the next screen, click the Launch your site button to make your site live online.
Choosing a Theme
Before we get into installing a theme, let’s answer the question that is on your mind:
What is a WordPress Theme?
A WordPress theme is the general look and feel of your restaurant Websites. It creates the placeholders for the content, installs the fonts, and applies your Website’s colors.
There are many popular themes, but the easiest and most widely used is the Astra Theme.
How do I install a theme in WordPress?
You will need to access your WordPress admin dashboard. Remember that you need to log in through your Bluehost dashboard or use your link www.yourwebsite/wp-admin.
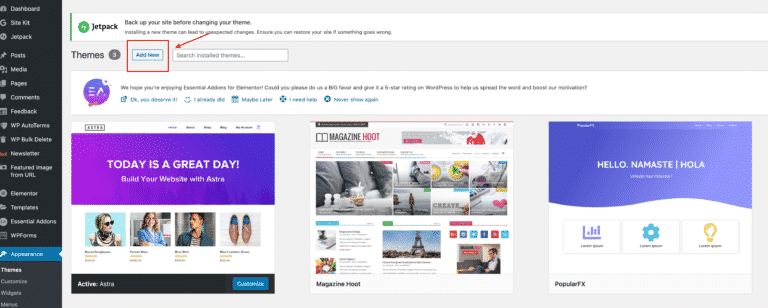
Navigate to the Appearance tab on your sidebar and choose Themes.
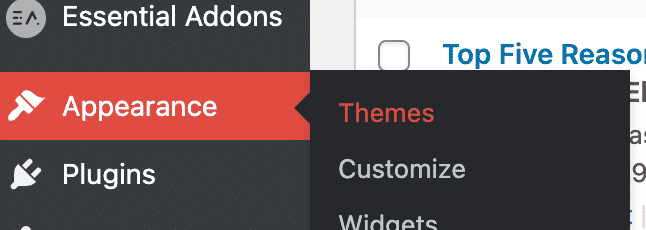
Your restaurant Websites may have a default theme installed. Either way, we are going to install the Astra theme as your default. On this screen, we click Add New.
Find the search bar to the right, and type Astra. Hover over the Astra Theme thumbnail and click install.

Once you install the Astra theme, your next step is to install plugins.
What are WordPress plugins?
Image WordPress like your smartphone that you can install apps software on. Just like your smartphone, there is an app store that you can use to download and install different apps to your professional Website. These plugins (apps) are the lifeline of WordPress. Without plugins, WordPress will be a boring website that is not up to date.
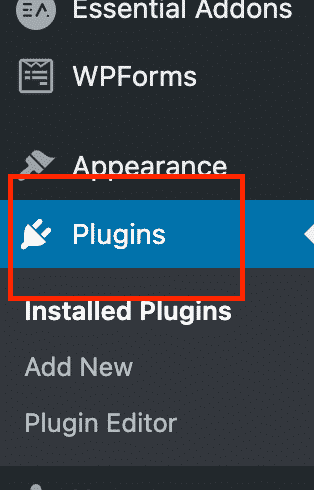
You can find the Plugins store on your sidebar, where it says “Plugins.” in this section, you can see what plugins are installed on your WordPress site, and you can also add new Plugins.
We are now going to install a few plugins software that you will need to customize your Website.
To install new Plugins software in WordPress, hover over the Plugins options on the sidebar, and click “Add New.“ If you are already in the Plugins screen, a button in the top left says: “Add new.”

We are going to install two plugins.
- Elementor
- Envato Elements
To find these plugins, type the names of these plugins one by one in the right search bar.
Click on “Install Now” and then “Activate.“
Here is a quick overview of what these plugins do:
With Elementor and Envato Elements, you can install and download beautiful already made templates for your restaurantWebsite.



What is a website template?
A website template is an already designed block of content that you can add to your professional Website and then edit. There are templates for any type of site that you are looking for. Some are free, and others are not. Elementor and Envato are two of the most widely used template plugins.
Congratulations! You have just saved yourself at least $500 in web design and development fees!
Let's create our Home page Design
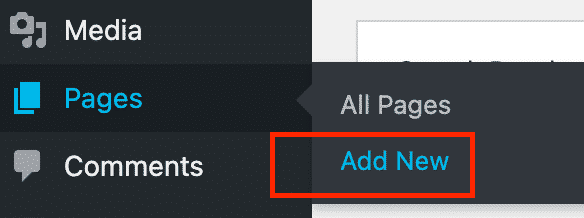
The first step in creating our homepage is to create a page. On your sidebar, hover over the “pages” option and click “Add new.”
This will take you to the WordPress Page Editor. A traditional WordPress page is created by “Blocks” in the editor. But for our Website, we are not going to use the blocks. Instead, we are going to use the Elementor plugin to build the Website.
But before creating your first Page with Elementor, we need to change some of the options. You can start by naming your page “Home Page” or “My Home Page.” the name is not too important for the moment.
When we are ready, your visitors will visit your website.com and not your website.com/homepage. On the right Page options sidebar, make sure to select the settings like below.
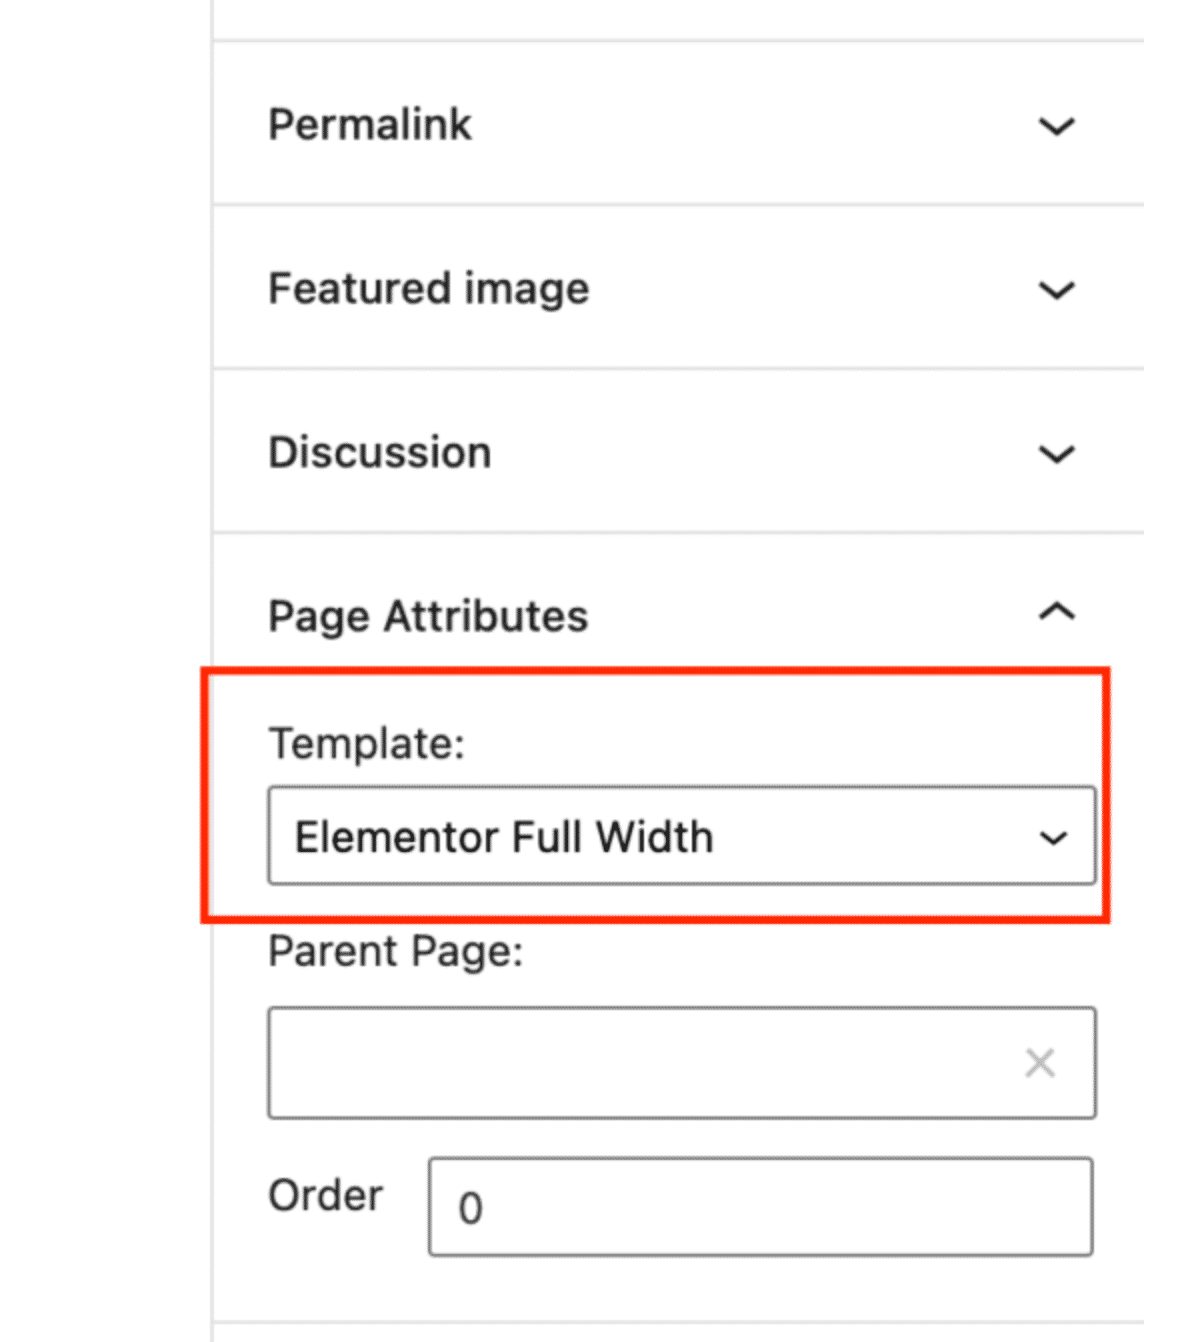
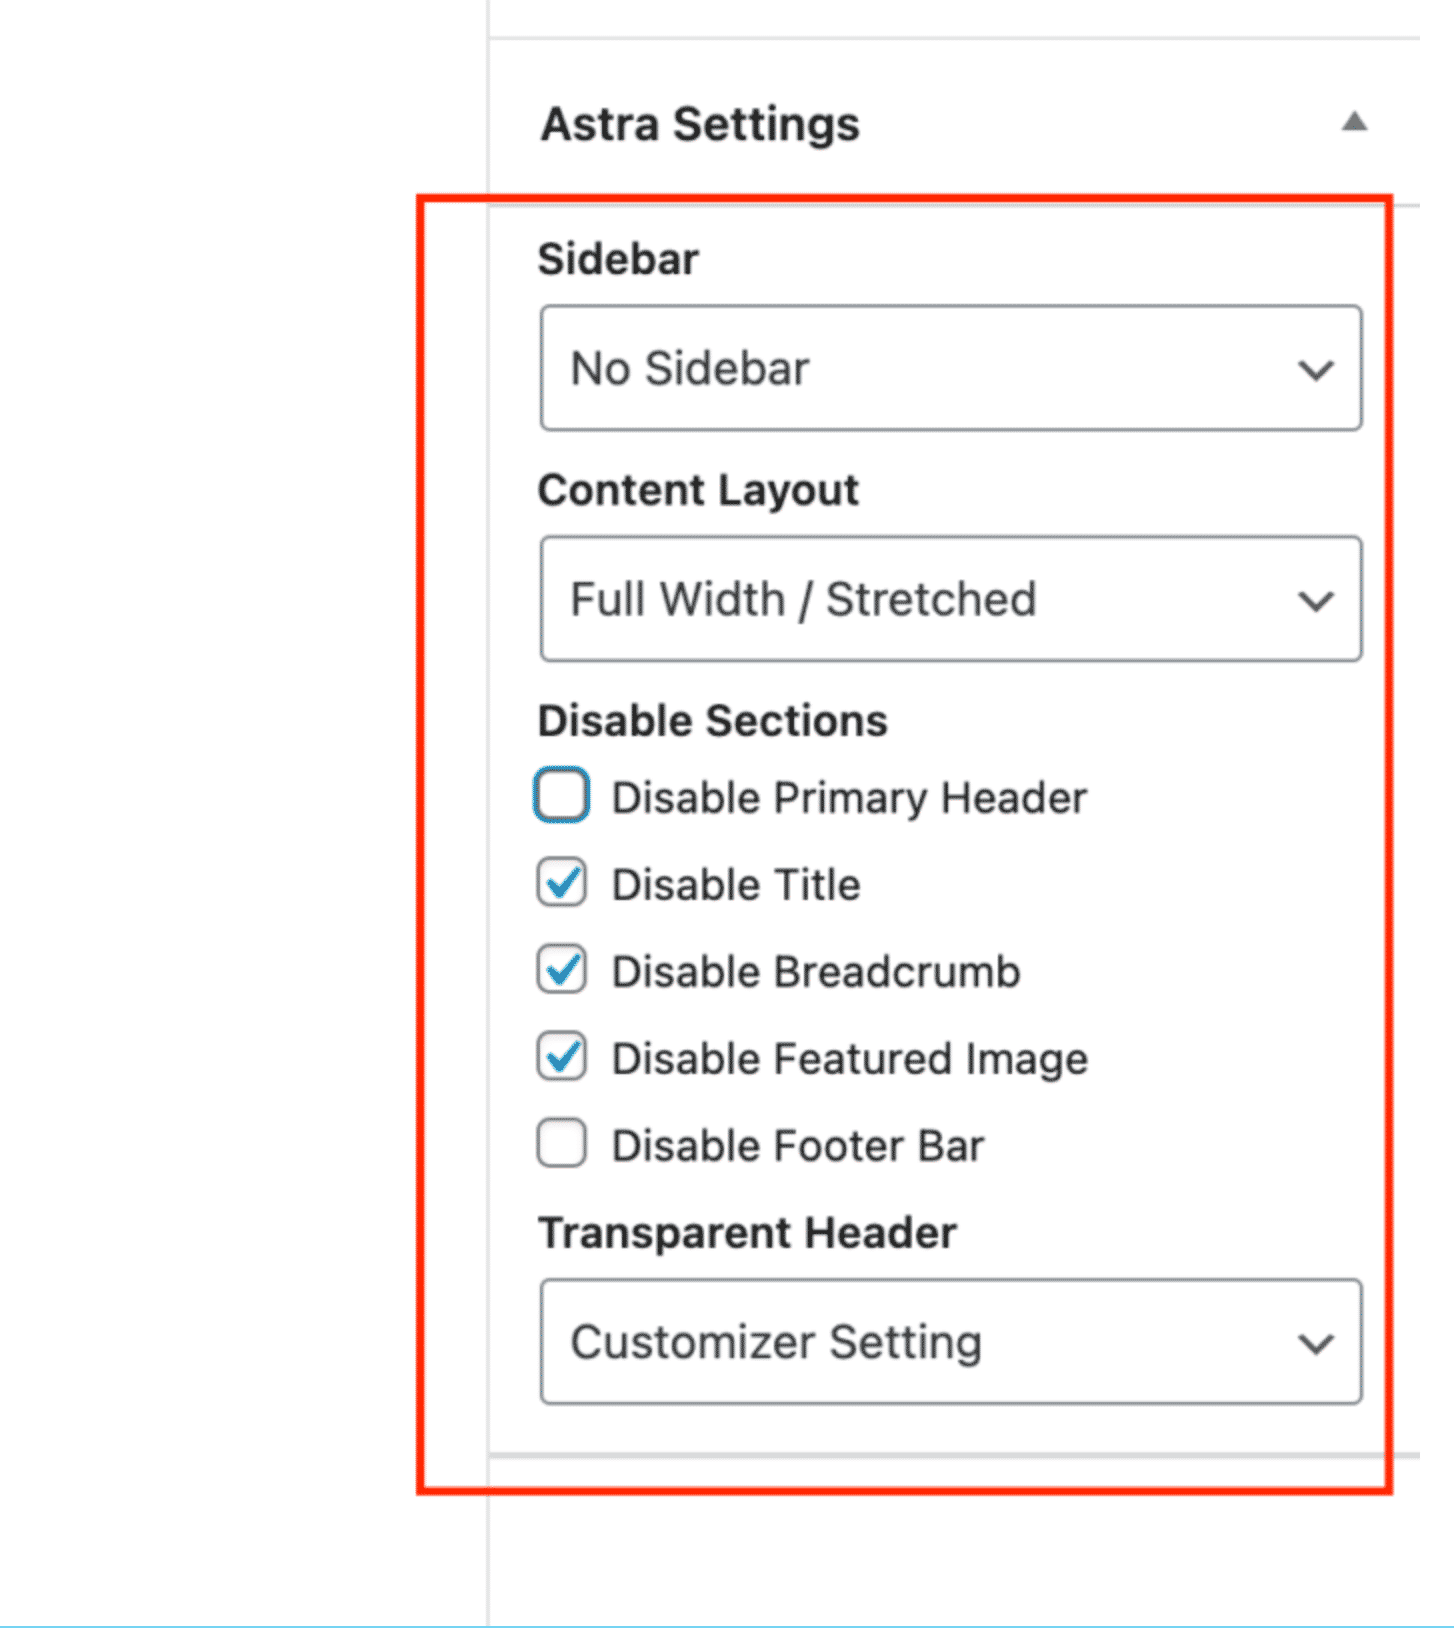
Once that is done, you should see a button on the top left that says Edit With Elementor. Click on that, and it will take you to the editing page.
You may get an error asking you to make sure if you want to leave the site. Say yes.
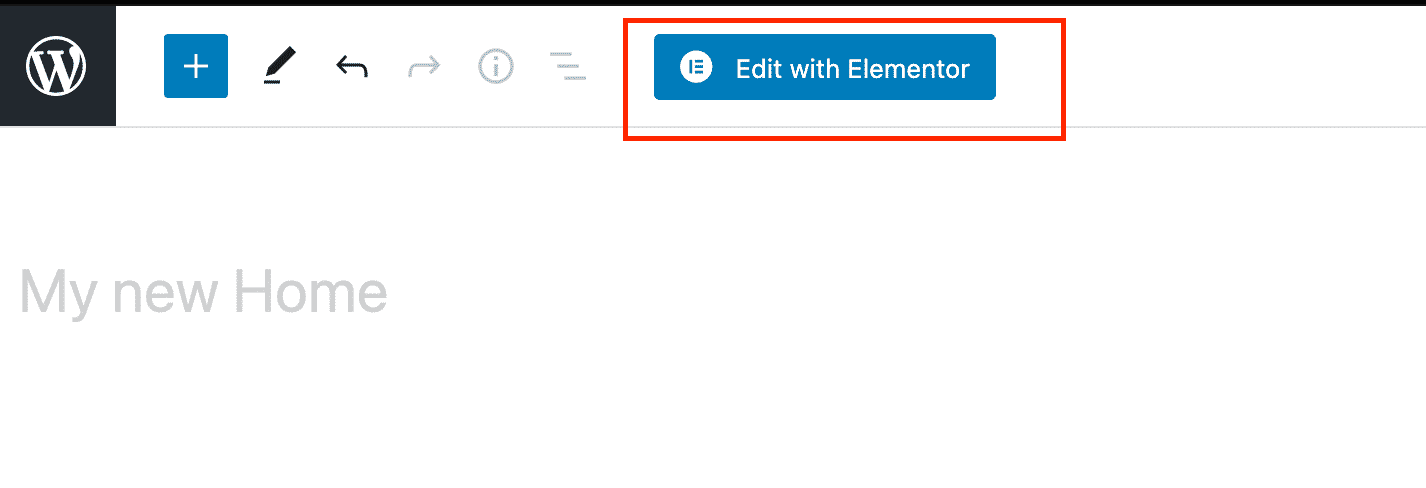
You are now in the Elementor Page Editor.
On the left of the screen, you can see the Elementor widgets, and in the middle, you have a transparent box with three icons. These are the options to begin building your site.
The first option is to create columns on your webpage. The second option is to insert Elementor template Blocks, and the third option is to insert Envato template blocks.
We are going to use the third Envato icon, which is green.

Now a window will appear, and you need to navigate to the free kit. Like I said before, there are thousands of template options. Here you can see that there are free and Paid. The Elementor options are like the Envato options, but Envato has a much bigger free template library than Elementor.
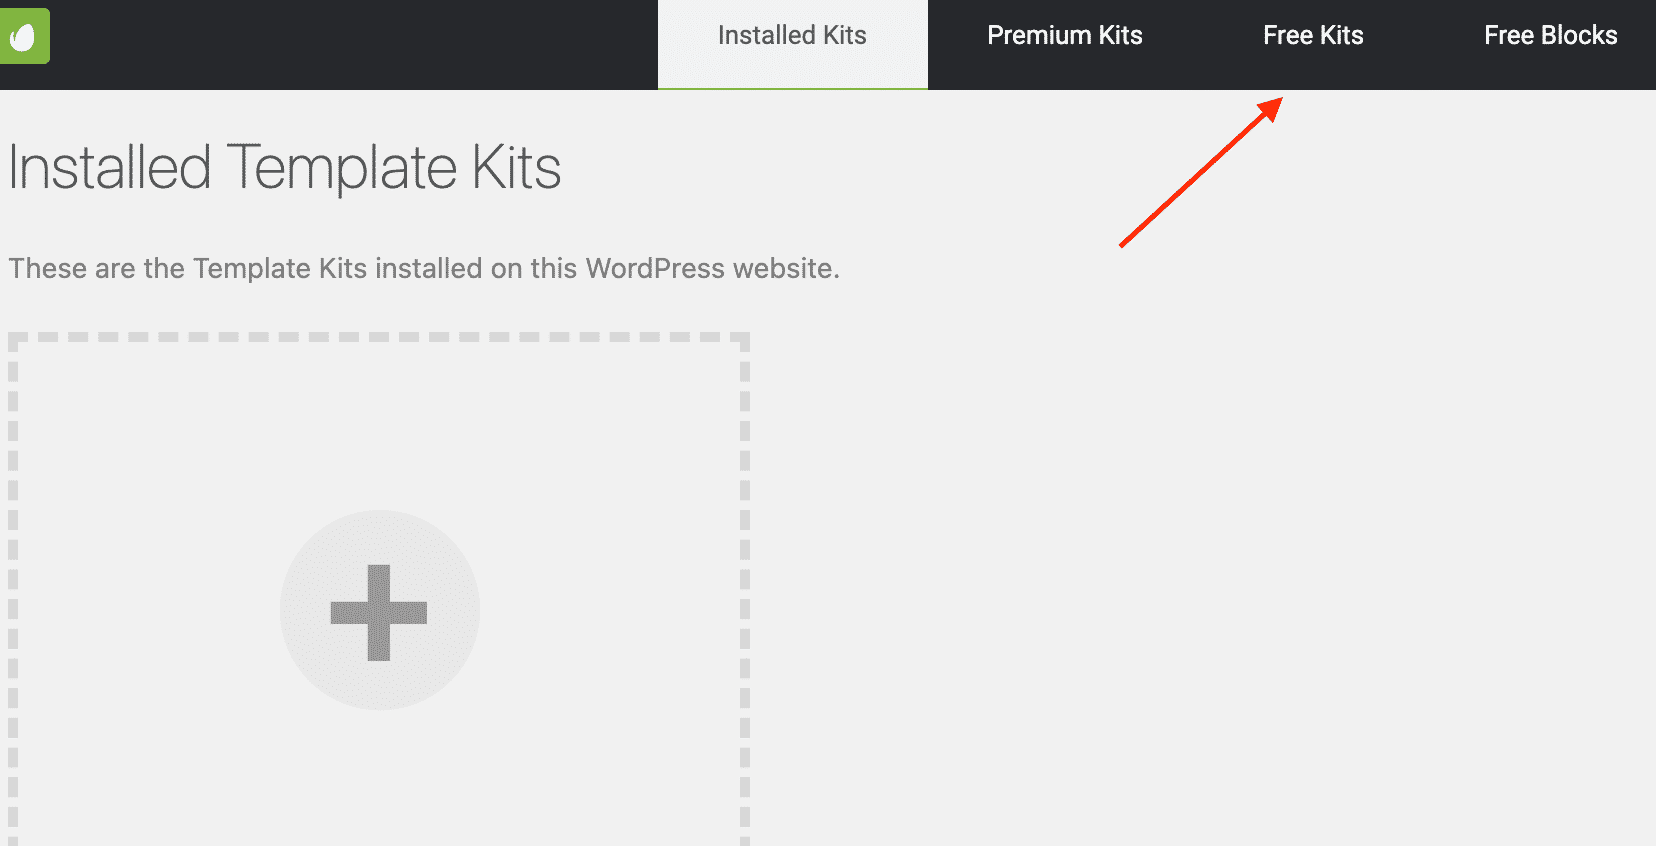
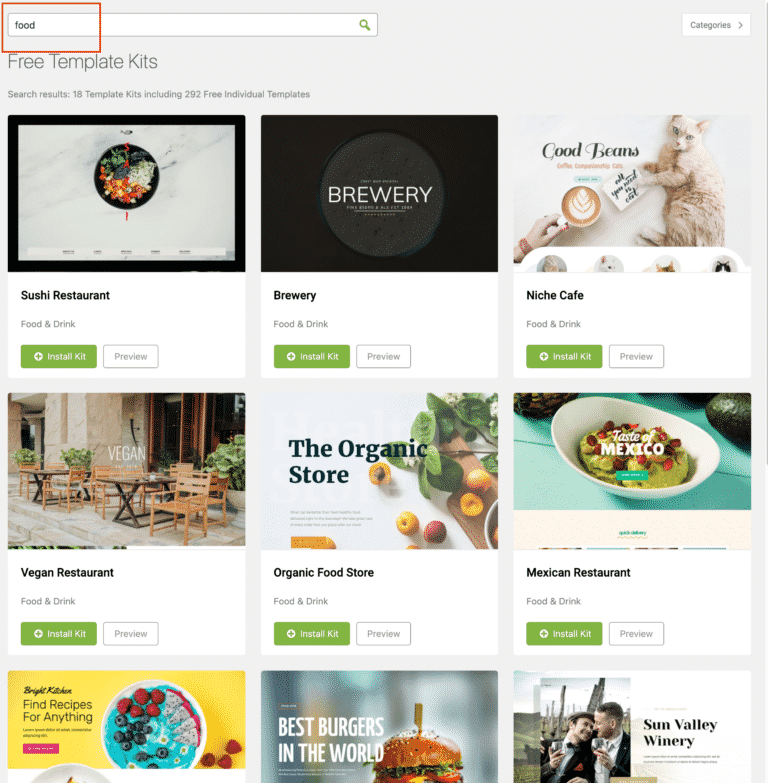
We will type in the search box for our restaurant website: “Food.” in the free kits section, you will get results for restaurant websites. In the premium Kits section, you will get many more products than in the free kits.
Currently, Envato offers a monthly subscription to access all their Premium kits. You can get more information with this link to look at all of what their monthly membership provides.
But remember, we are trying to keep this under $99.
We already spent the money that we are going to spend on creating this site. So, we are going to work with the free kits.
Choose the template that you see fit your restaurant the best. Remember that no matter what template you use, you can easily change it later.
I like the Mexican template, so I am going to choose that. You can click on the “Preview” button, and it will take you to another page where you can see the full contents of the webpage live.
I have already seen it, so I am going to click on “Install kit.”
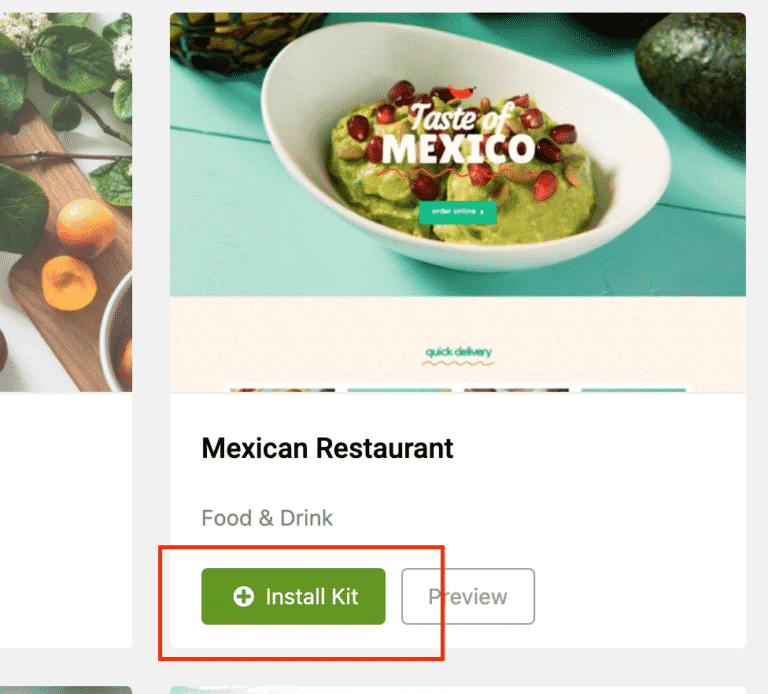
Once the kit is installed, click on “View kit.” You can also navigate to the Template Kits tab in the window.
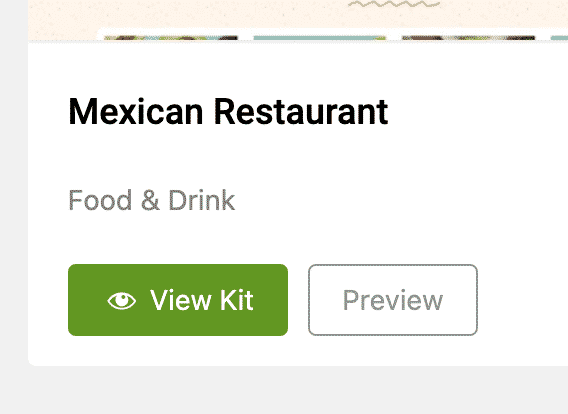
The remarkable thing about the Envato plugin is that you can install as many kits as you like and mix and match your pages’ templates.
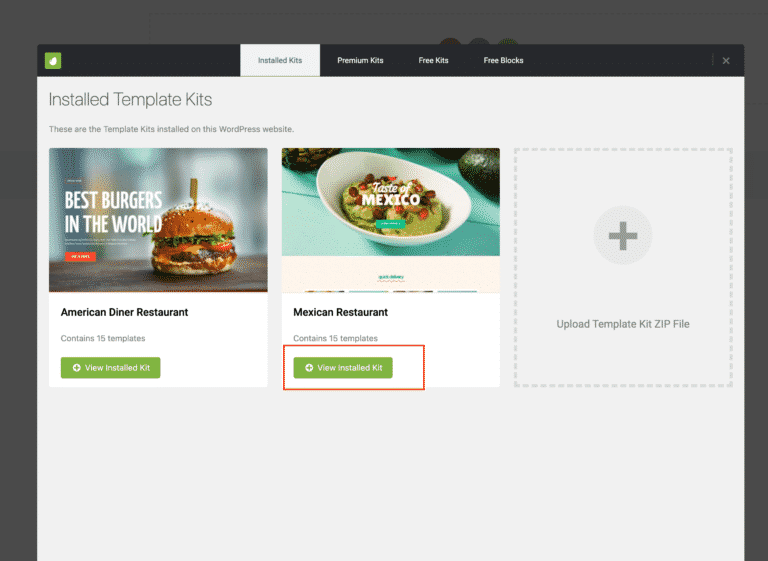
In my case, I have installed two kits.
Click on the “View Installed Kit” button to continue with ease.
You may need additional requirements to continue building
Depending on the kit you installed, you may notice that you need to install additional resources to run the template.
Go ahead and install any additional requirements. In my case, the template is asking me to install Elementor Pro.
the templates that do not indicate “ignore requirements”, do not require Elementor Pro.
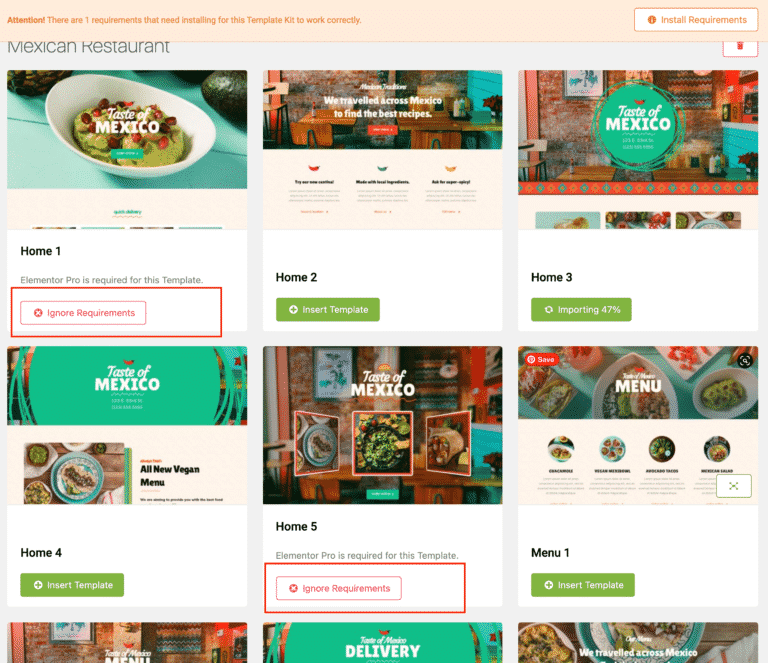
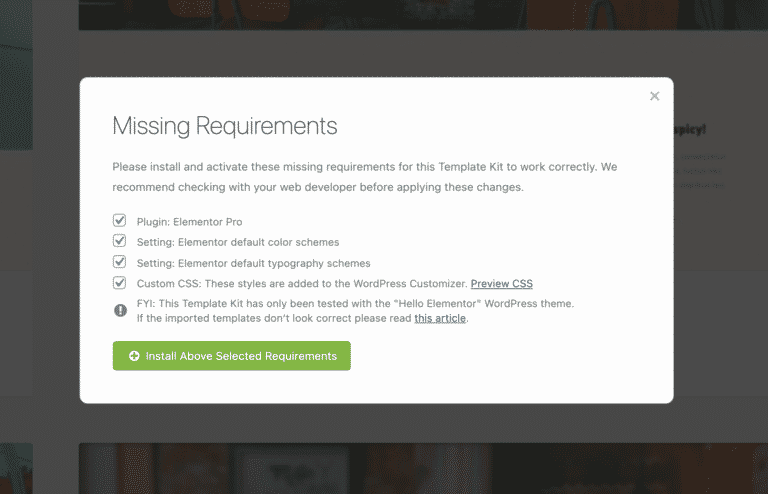
The Elementor plugin that we installed earlier is the free version of the Elementor suite. Elementor also offers its pro version, which includes many more features and templates. The Elementor Pro version unlocks many awesome widgets and tools that you can use to customize your site even more.
Some of these templates may include additional widgets or features, that are not included in the free version of Elementor.
If you are interested in Elementor Pro, you can click here for more details. They offer a yearly plan of $49 for 1 site, which is excellent.
I have Elementor Pro on all my sites, and it really makes a difference when designing and getting creative with website building.
Now that you have installed your additional requirements click on “Insert Template,” It will begin to import the template to your page. Shortly, you will see that your page has transformed to the template you selected.
That is, it! Welcome to your new professional Website!
Elementor is easy to use because you select the items on your page and edit them on the left sidebar with ease.

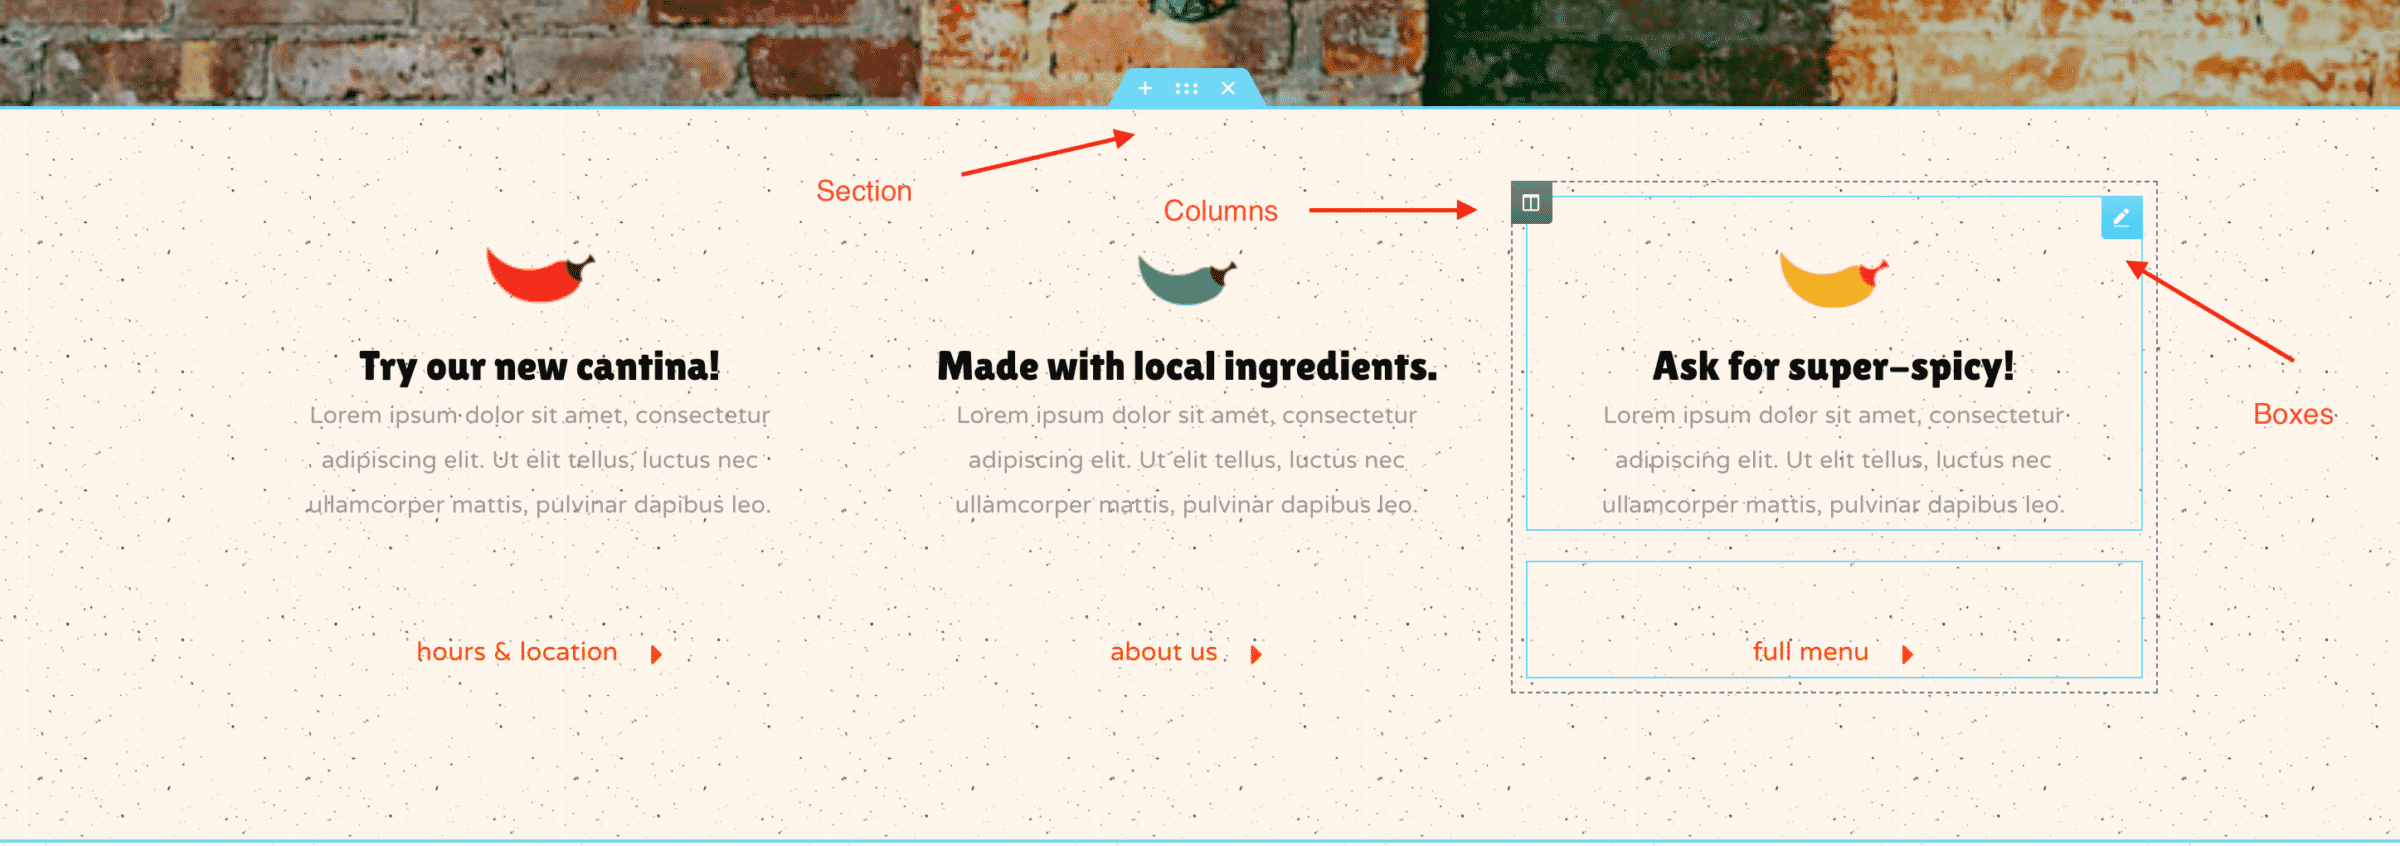
You can completely customize all the information on the page. If you click on the Heading text, you will see that you will get options to control or modify that block on the left column. I recommend that you edit all text from the options section in the sidebar. It is much easier to edit.
The layout of Elementor is created by sections that contain columns. And the columns have boxes that contain your content. You can drag, drop, or edit by right clicking the new tabs.
If you want to change an image. Simply click on an image on the page, and you will see the options on the left sidebar appear.
Click on the options section’s image, and a window will appear to select or upload a new idea.
Publish your page
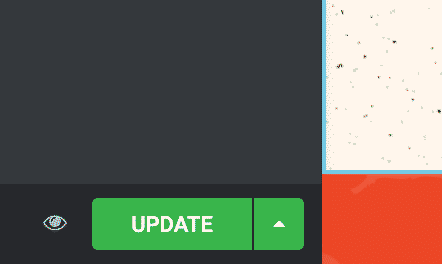
Now that you have your homepage created and designed click on the green “Publish” button in the options bar.
That is it! Your page is published. You can keep editing your page; just make sure to click update each time.
Now let us make this page your primary homepage that you want your customers to see when searching for yourwebsite.com.
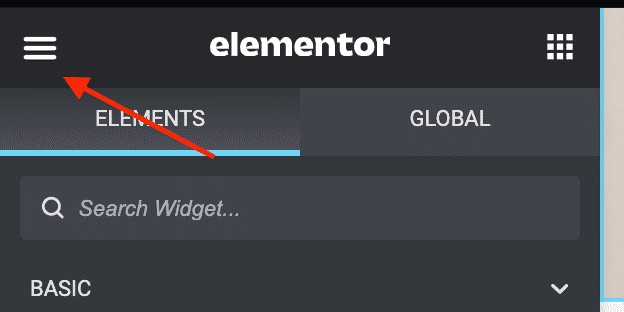
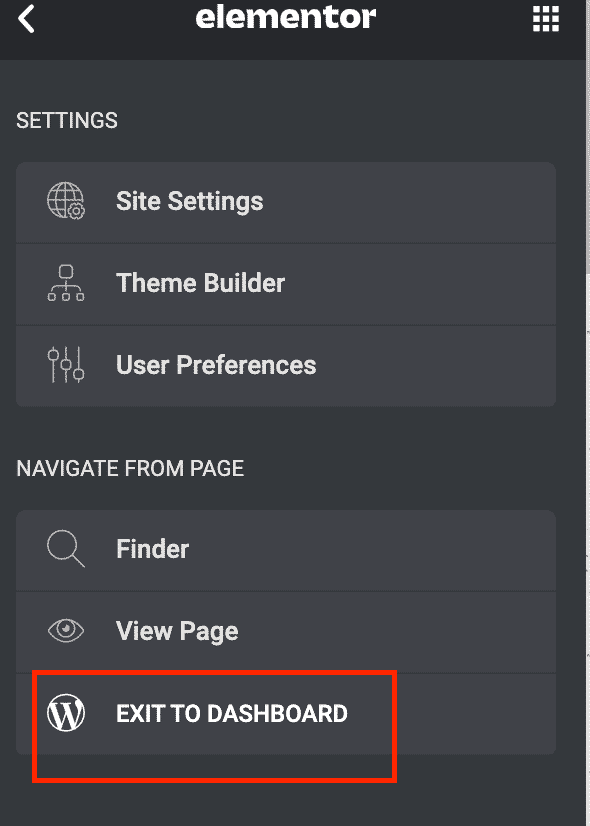
On the options bar, click the hamburger button on the top left of the column and click ‘Exit to Dashboard”.
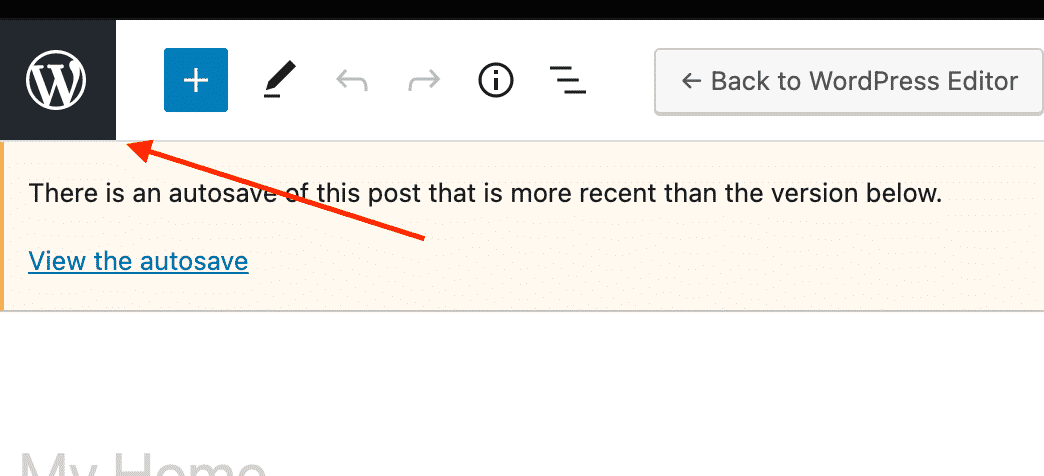
This will take you back to the Edit Page screen. Click on the top left WordPress logo on the page, and now you are back at your admin panel.
Here you will see all the pages that your professional Website has. Mine may look different than yours. Depending on the pages that you have created.
To make your homepage your primary page, click on Settings, then Reading.
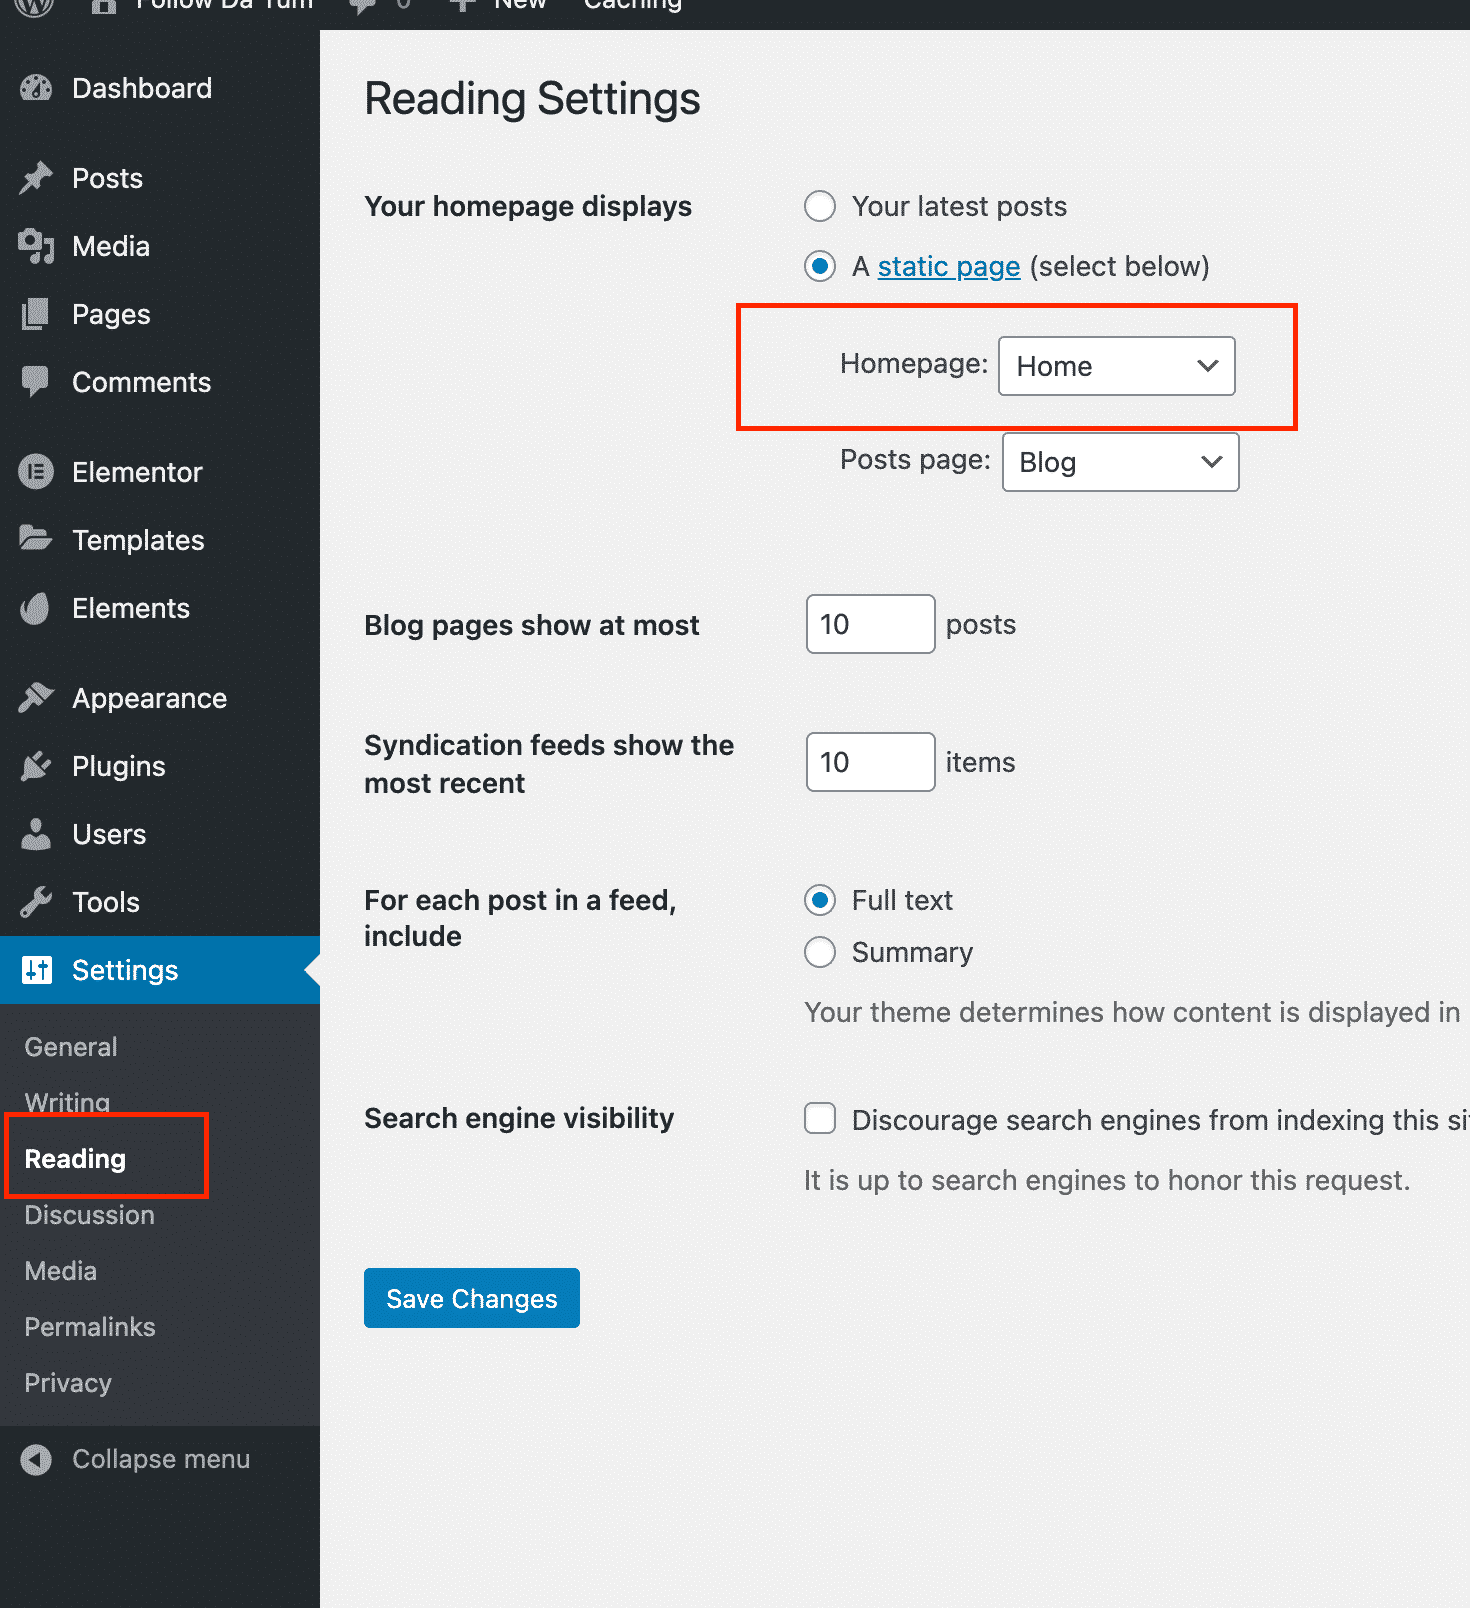
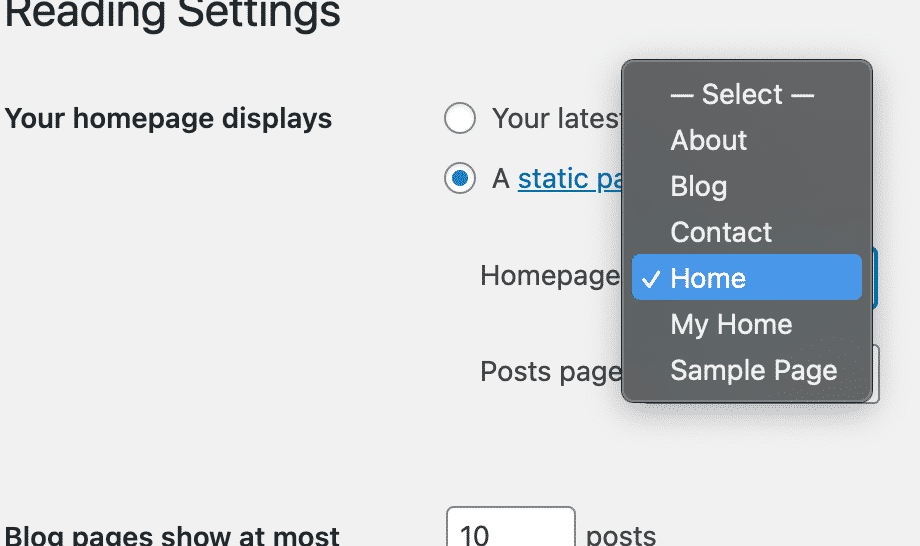
Here you will select the page that you just created. In my case, my page is called My Home. Then click on the Save Changes button.
Now visit your mywebsite.com link, and test that the page you just created is your home page.
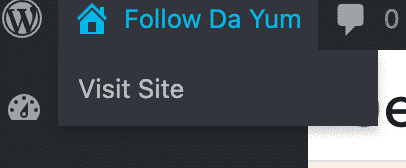
Another way to test your link is by Clicking on your Website name in the top left of the admin
screen and click Visit Site. This will take you to your Website also with ease.
You can continue to add pages to your Website using the same process that we used before.
Usually, you would like to create four main pages:
- Home page
- About Us page
- Contact Us Page
- Menu Page
You can find templates for most of these in the Envato or Elementor Blocks editor like we did before selecting the homepage template.
Remember to Launch your site when you are finished!
This is the final and most important step in launching your professional website with ease.
Make sure to navigate to the button that says: Coming Soon Active to launch your site.


Additional plugins to install
Now that you have created your first Website and are a total badass, there are three more free plugins that I recommend you incorporate to get the best out of our Website.
- Yoast SEO Plugin
- Gloria Foods Online Ordering Plugin
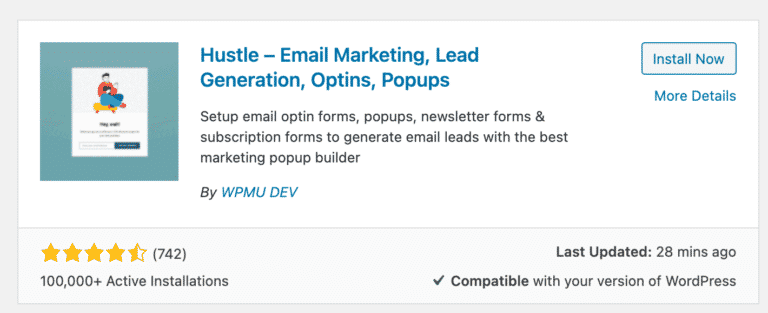
- Hustle – Email marketing and Lead generator Plugin
Yoast SEO Plugin
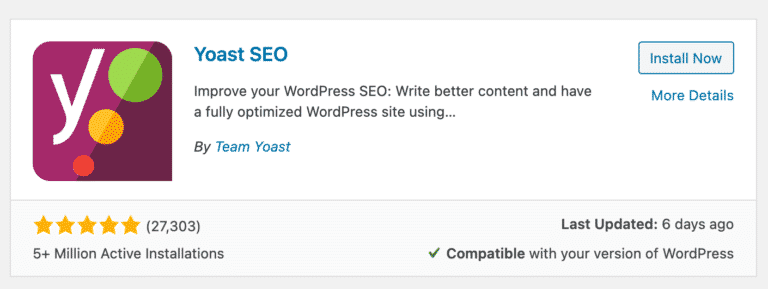
Yoast SEO is the best WordPress tool to enhance your visibility and rankings on search engines like Google and Yahoo. Once you get your Website up and running, I imagine that you will want visitors. With the Yoast plugin, you can customize each page to appear on search engines effectively.
Gloria Foods Online Ordering
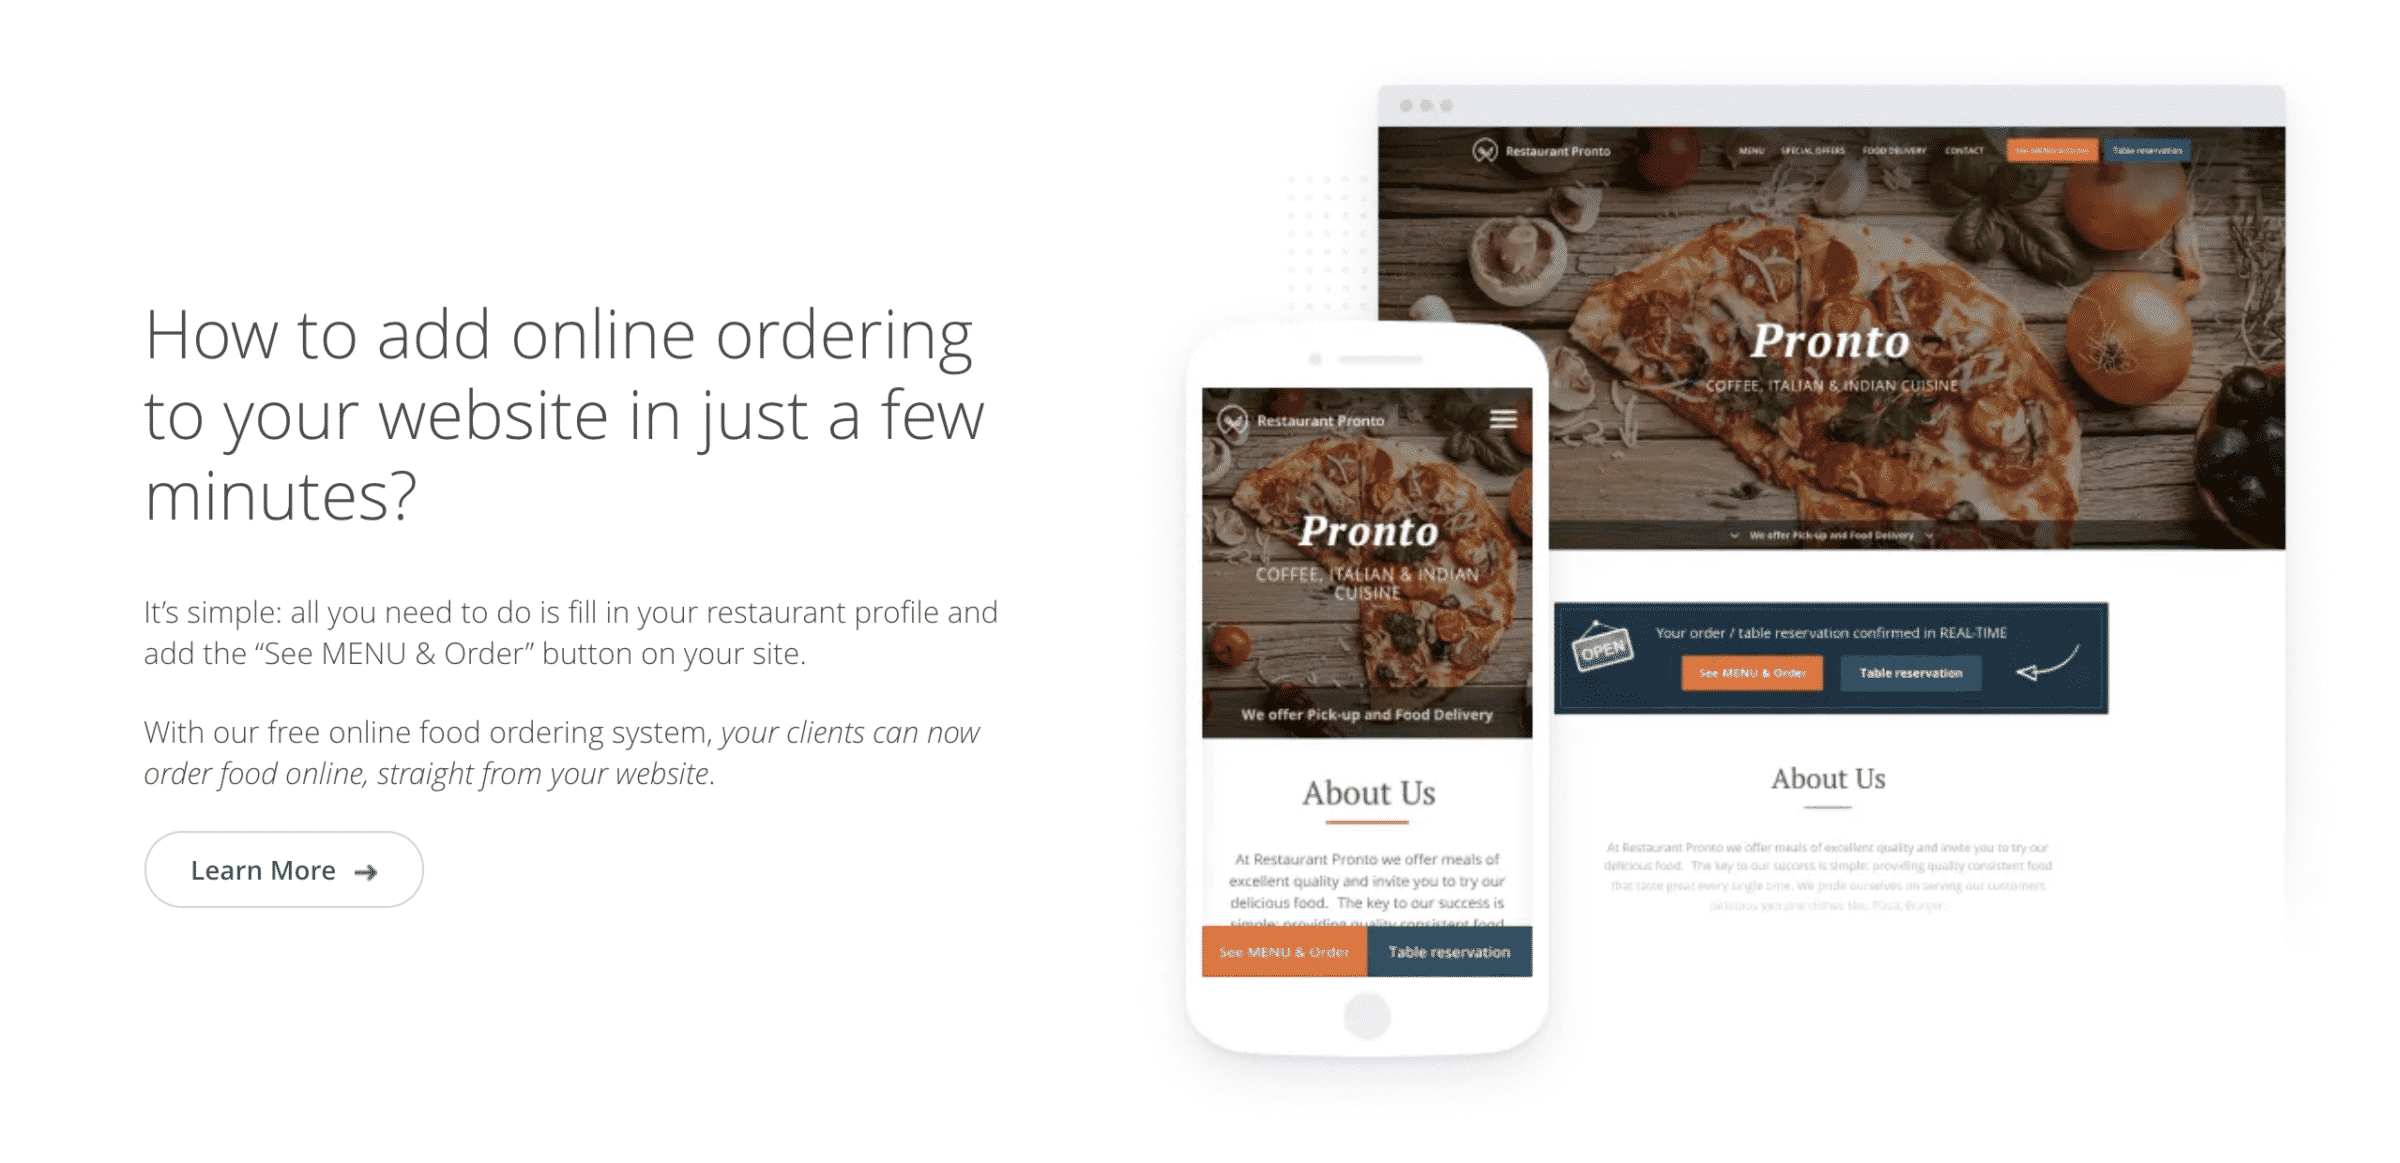
Suppose you are looking to incorporate online ordering for your customers on your We. In that case, site, the Gloria Foods plugin is your best option. Gloria food is a free plugin that you can install on your WordPress site. The plugin gives you all the features you need to get your business running online: no more paying Ubeareats or Doordash ridiculous transaction fees.
Take control of your online business with the Gloria Foods plugin. It is effortless to use, and their ServiceDesk is helpful and available 24 hours.
Hustle Plugin
Once you get your Website, you will want to start collecting email addresses. The hustle plugin is the best free plugin to do this. They offer easy-to-set-up popups and banners that you can use to appear on your site to start building your email list. By building your email list, you can promote using professional emails with ease, and not have to rely on social media.
Congrats on your new Website!
Give the customers what they want.
This tutorial will only get you through the door in launching your restaurant website. The possibilities that you can create with WordPress are limitless.
Remember that the main reason that you would like to invest in a website is to own your own part of the web. Try to break free of social media advertising and control the traffic of your customers.
A website gives your enormous restaurant value and opens the door to potential profit by implementing online ordering.

FTC: We use income earning auto affiliate links. More.





4 thoughts on “How to Build Restaurant Website Today For Less Than $99 (2021)”
Pingback: 10 tips to use Fiverr for your Restaurant and Save Money (2021)
Pingback: The Best Puerto Rico Food Delivery Apps | 2021 | Island Dwellers PR
Pingback: processbuild48083.wixsite.comsdehnkys
Pingback: http://andere.strikingly.com/